
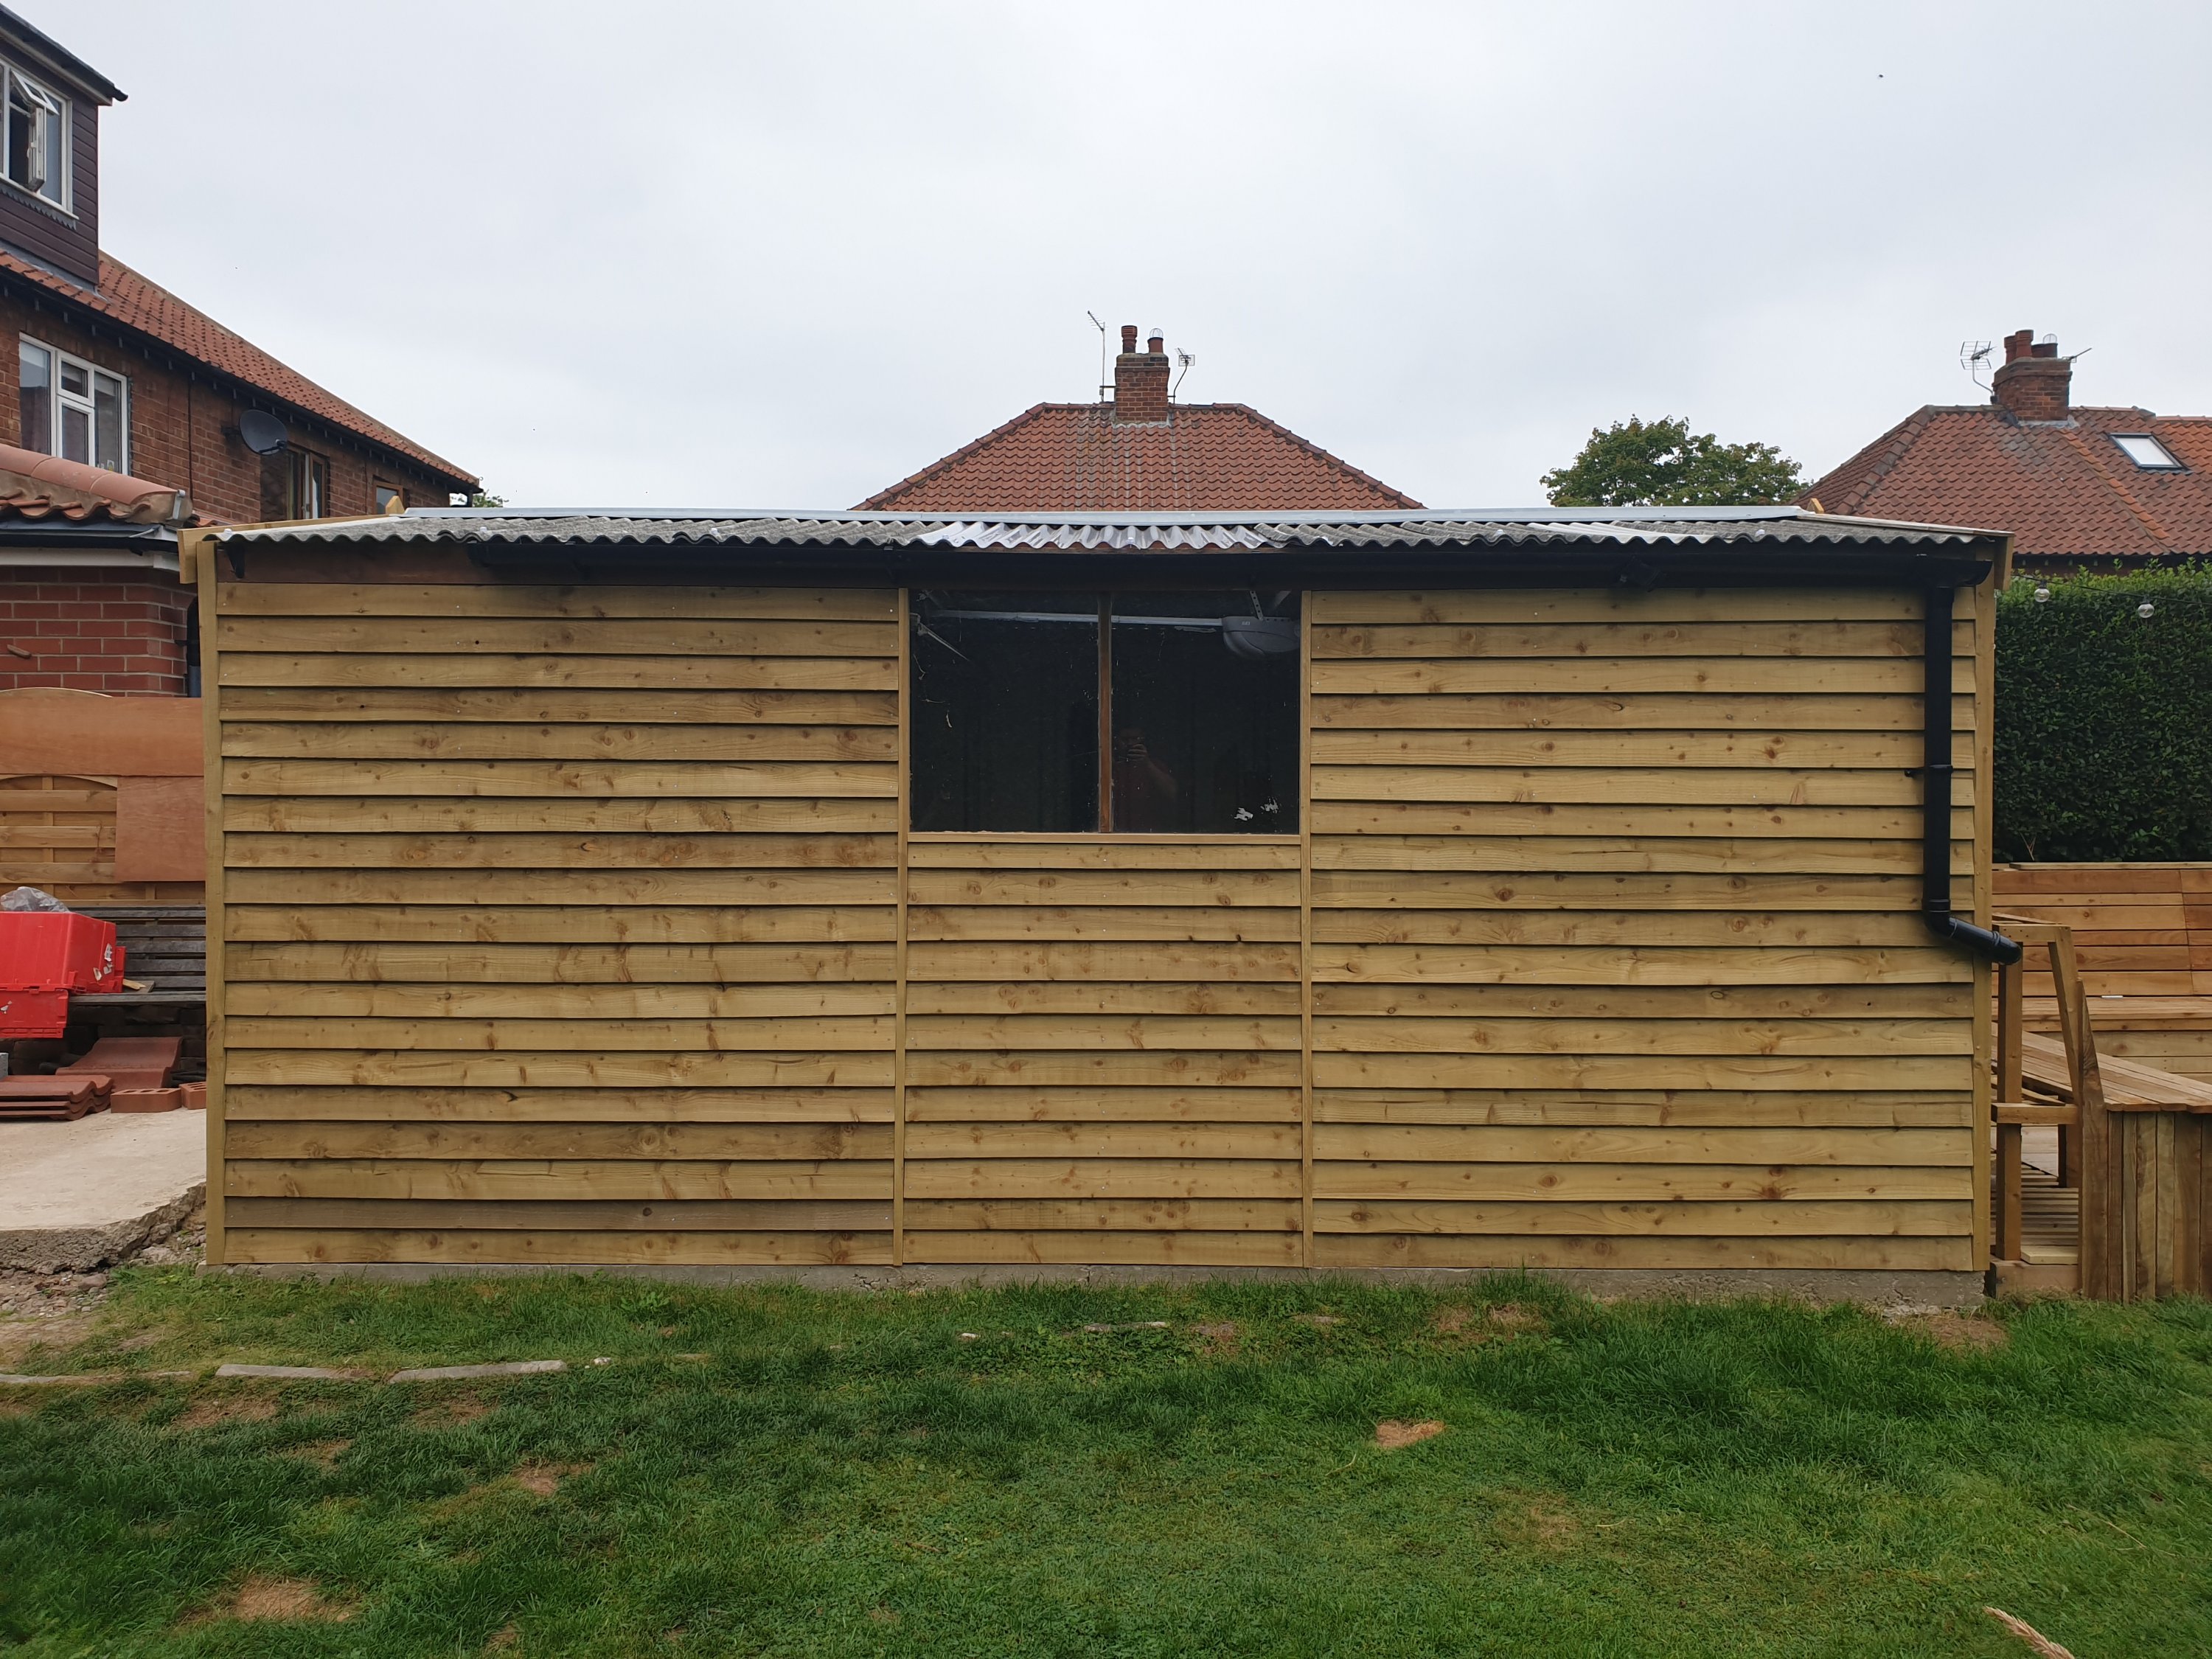
If our pebbledash garage had a mother, she’d call her own child ugly.
We thought of giving it away for free but decided that rather than get rid of it then build a replacement shed a similar size (5 x 2.5 metres) for a few grand, we’d simply tart up what we already had. It wasn’t quite as simple as hoped, but I reckon the finished result was worth it.

If you’re interested in doing something similar, the materials and equipment I used are at the bottom of this post.
Battens
The concrete that’s used to create the pre-fab panels of sectional garages is incredibly dense and often reinforced, meaning that drilling into it is a nightmare. Whilst a powerful SDS drill may just about manage it, you’ll likely burn out the motor, ruin dozens of masonry bits and risk shattering the panels. So after reading various horror stories, I decided to work out another way of cladding our garage.
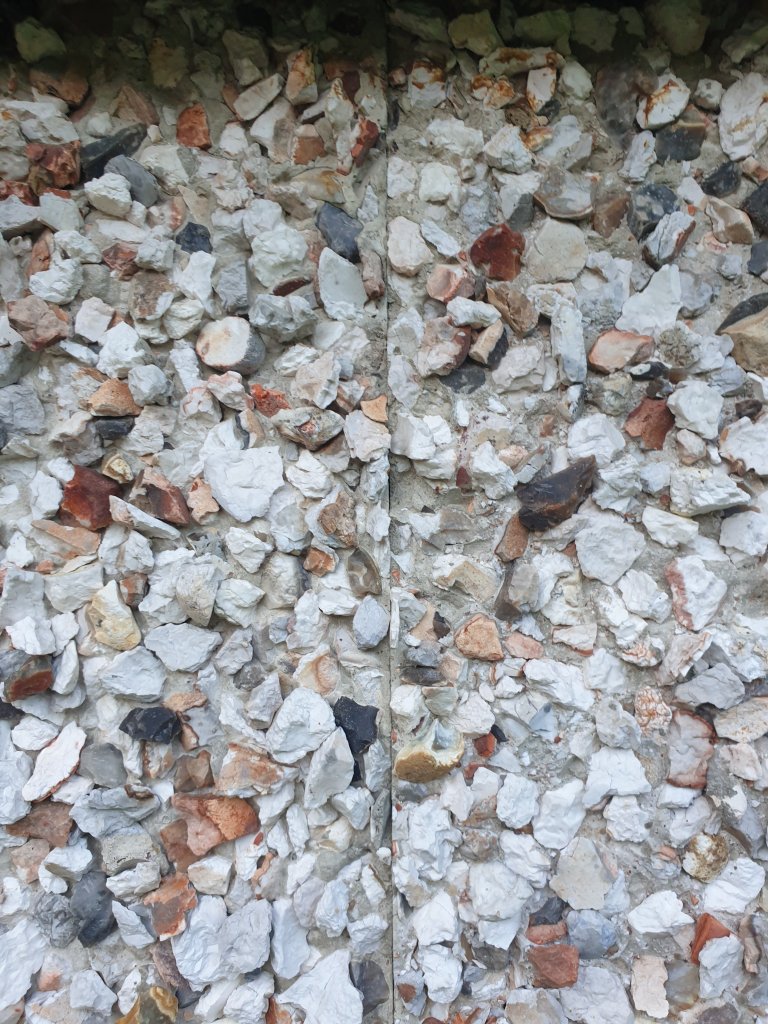
Garages like ours are made up of a number of tall concrete panels, usually 60cm wide. They’re fixed together with long bolts that attach through flanges on the inside.

Because the garage is made up of separate sections, there are small gaps every 60cm where panels meet. I figured that these openings would be much easier to drill through than straight into the concrete.
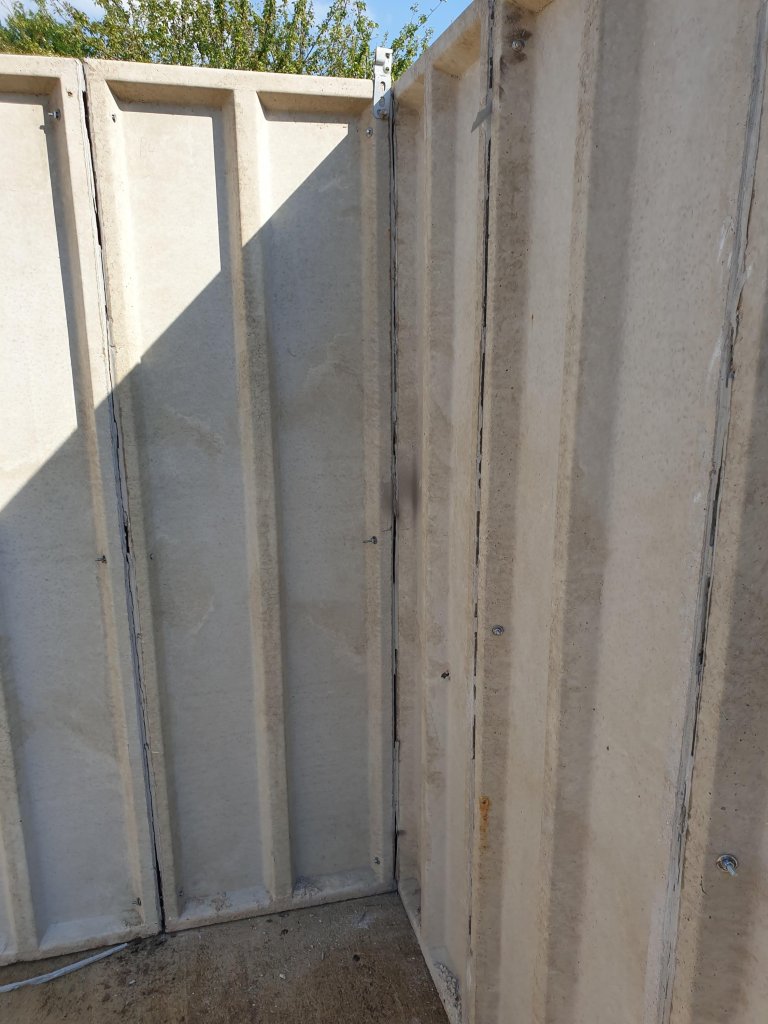
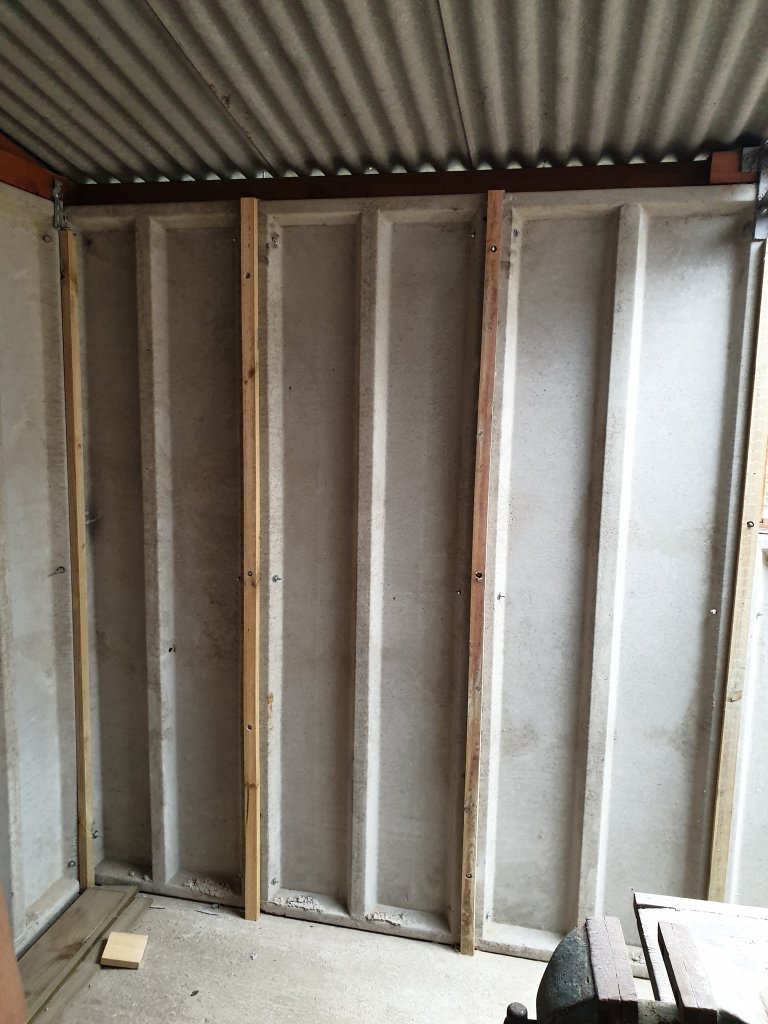
After drilling 3 holes down each panel gap, I threaded a long bolt through a batten on both the inside and outside of the wall and used a flange head nut either side to tighten the battens against the wall. In case that made no sense whatsoever, here’s a wee diagram that my glamorous assistant drew.

Rather than buying long bolts, I bought some lengths of M6 threaded rod and used an angle grinder and a file to make my own (way cheaper).

The inside and outside battens effectively pull against each other with the concrete panels in between, making a very robust concrete sandwich and a perfect surface against which to nail the cladding onto. The added bonus of using this method is that I was left with battens throughout the inside of the garage which I’ve used to make a French cleat tool storage wall.
Chances are, you’ll still have to sacrifice a few masonry bits for this job as the concrete is ridiculously hard stuff. The bit below doesn’t look like it, but once upon a time it was a masonry bit, before the concrete ripped off the cutting tip. So it’s worth having a few bits on hand and definitely use an SDS drill rather than a bog standard combi drill on hammer mode.

I found it helped to drill a small hole first before drilling a larger hole that the bolt would comfortably fit through.

This technique worked well for the rear and right side of the garage (didn’t clad the left side as it’s hidden by a fence), but the front only had one very small panel either side of the garage door and so no gaps between panels. This meant finding alternative ways to fix the battens in place.
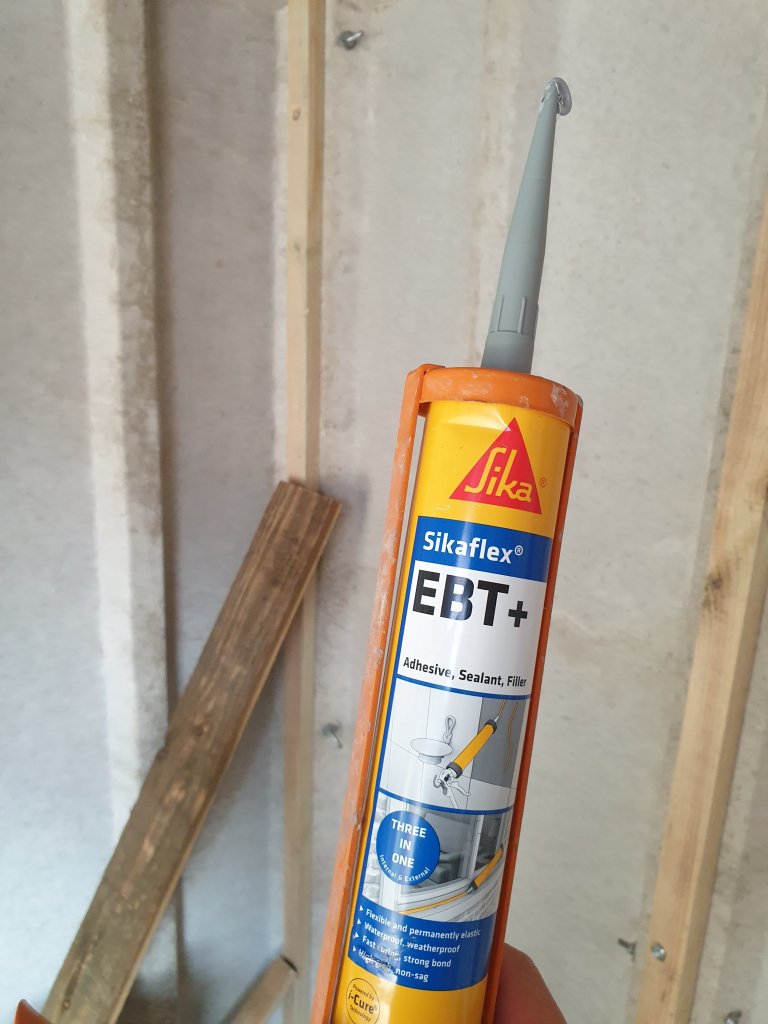
I used a combination of adhesive & brackets which worked okay but I’d definitely recommend drilling through the gaps where possible.

Once a few of the battens were in place, I moved onto cladding.

Cladding
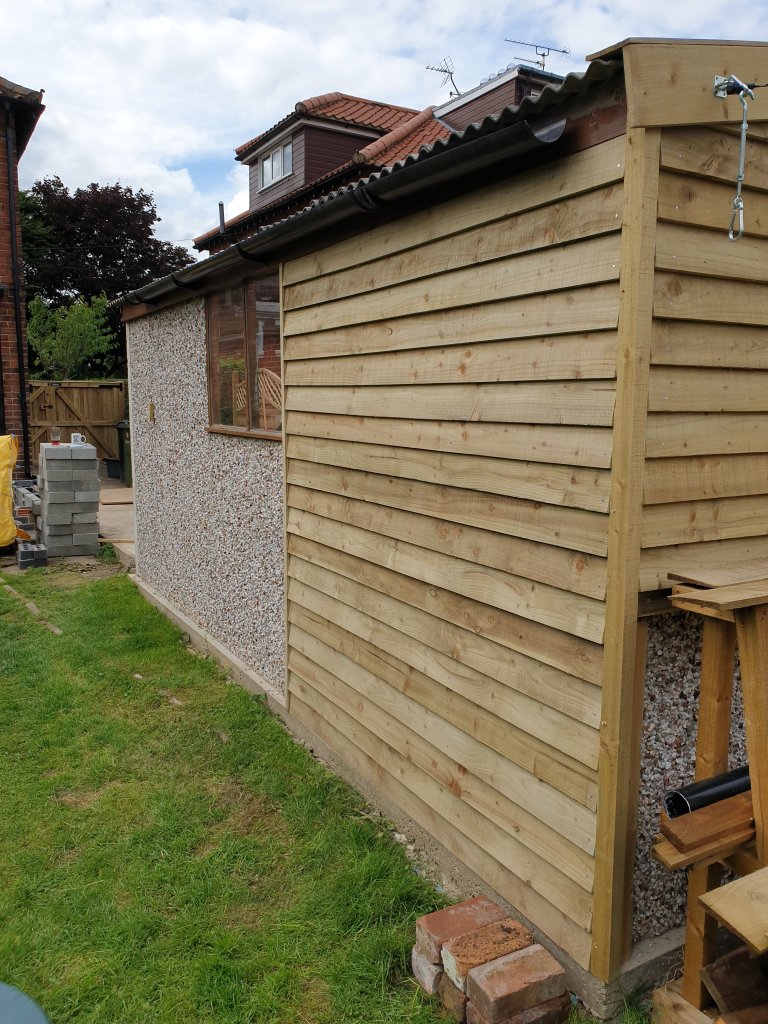
To be consistent with the driveway gate that I built, I opted for feather edge to clad the garage. It’s pretty cheap compared to other options and I think it looks great.
The cladding process was really easy once the battens were in place. After measuring up, I’d cut a length of feather edge to size and then give it a quick sand with 80 grit sandpaper. You don’t need to do this, but feather edge boards are typically made from quite low quality timber and so a cheeky sand makes a big difference.


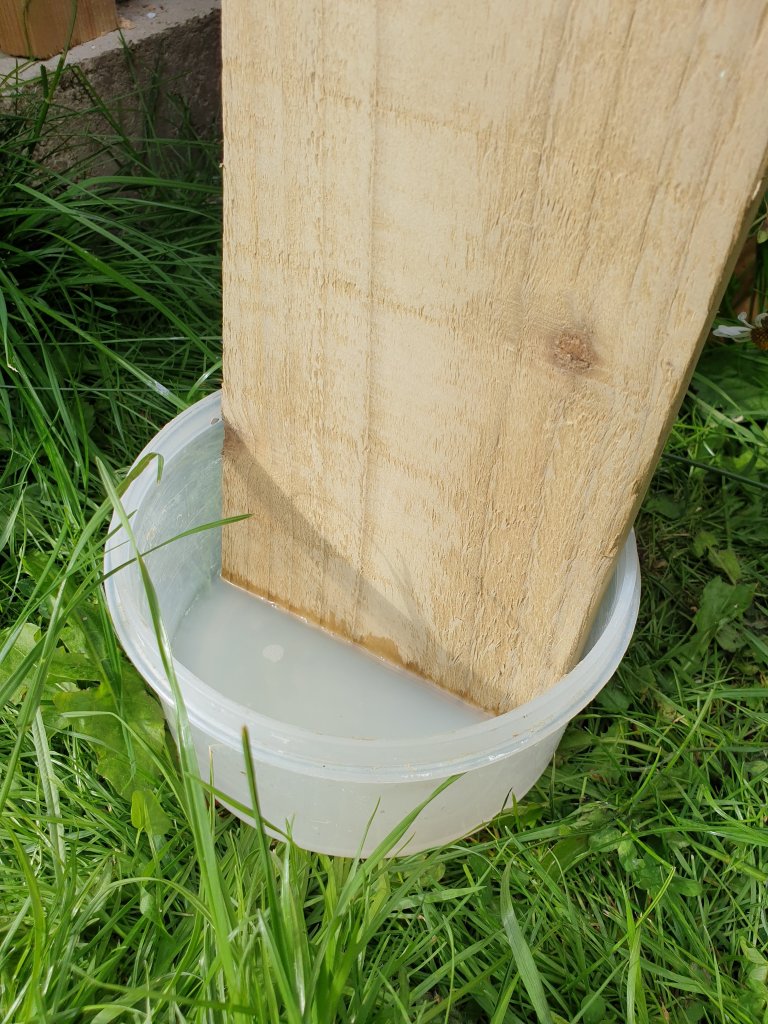
Before fixing the cladding in place I dipped the cut ends in a wood preserver. In time, the end grain will rot if no preserver is applied so it’s really important to do this.
With the cladding cut to length, sanded and preserved, it was time to start fixing the boards in place. Starting at the bottom and working up, I’d rip cut the first board to just 3cm wide with my circular saw (easier with table saw) as this would provide the packer for the bottom feather edge board so that it would jut out at the bottom. Otherwise the first board would sit flat against the battens which wouldn’t look right.

With the bottom packer in place, I begin nailing the rest of the boards in place. Each board is 12.5cm wide and is overlapped by 2.5cm by the board above. To make sure that the galvanised ring shank nails I used went through only the top board and not the one it overlaps (to reduce the chance of splitting), I hammered nails in 3cm from the bottom of the board. Remember to give the nail a couple of taps to blunt the tip or you’ll split the the wood like I did.

You could make a simple jig to make sure that the boards are positioned with exactly 10cm of overlap. Instead of doing this, once I’d fixed a board in place I’d just make a mark 2.5cm down from the top and then used a spirit level to make sure the spacing was consistent across the length of the board.

If you’ve not got anyone to help you hold the cladding in place whilst you hammer in nails, it’s worth tapping the nails in slightly before offering the boards up to the battens so you can focus on getting your levels right.

After the first two or three boards you get into a flow and can make some decent progress in an hour or two. It’s worth screwing in a temporary length of scrap wood onto the batten where the cladding ends so that it butts up against it and is perfectly vertical.

While cladding my workshop more recently, I made a couple of jigs to make the feather edge spacing quicker and I’d really strongly recommend doing this. Much quicker and more accurate so the 10mins spent cutting out the jigs is well worth it. You can see an example of the jig in the below pic.

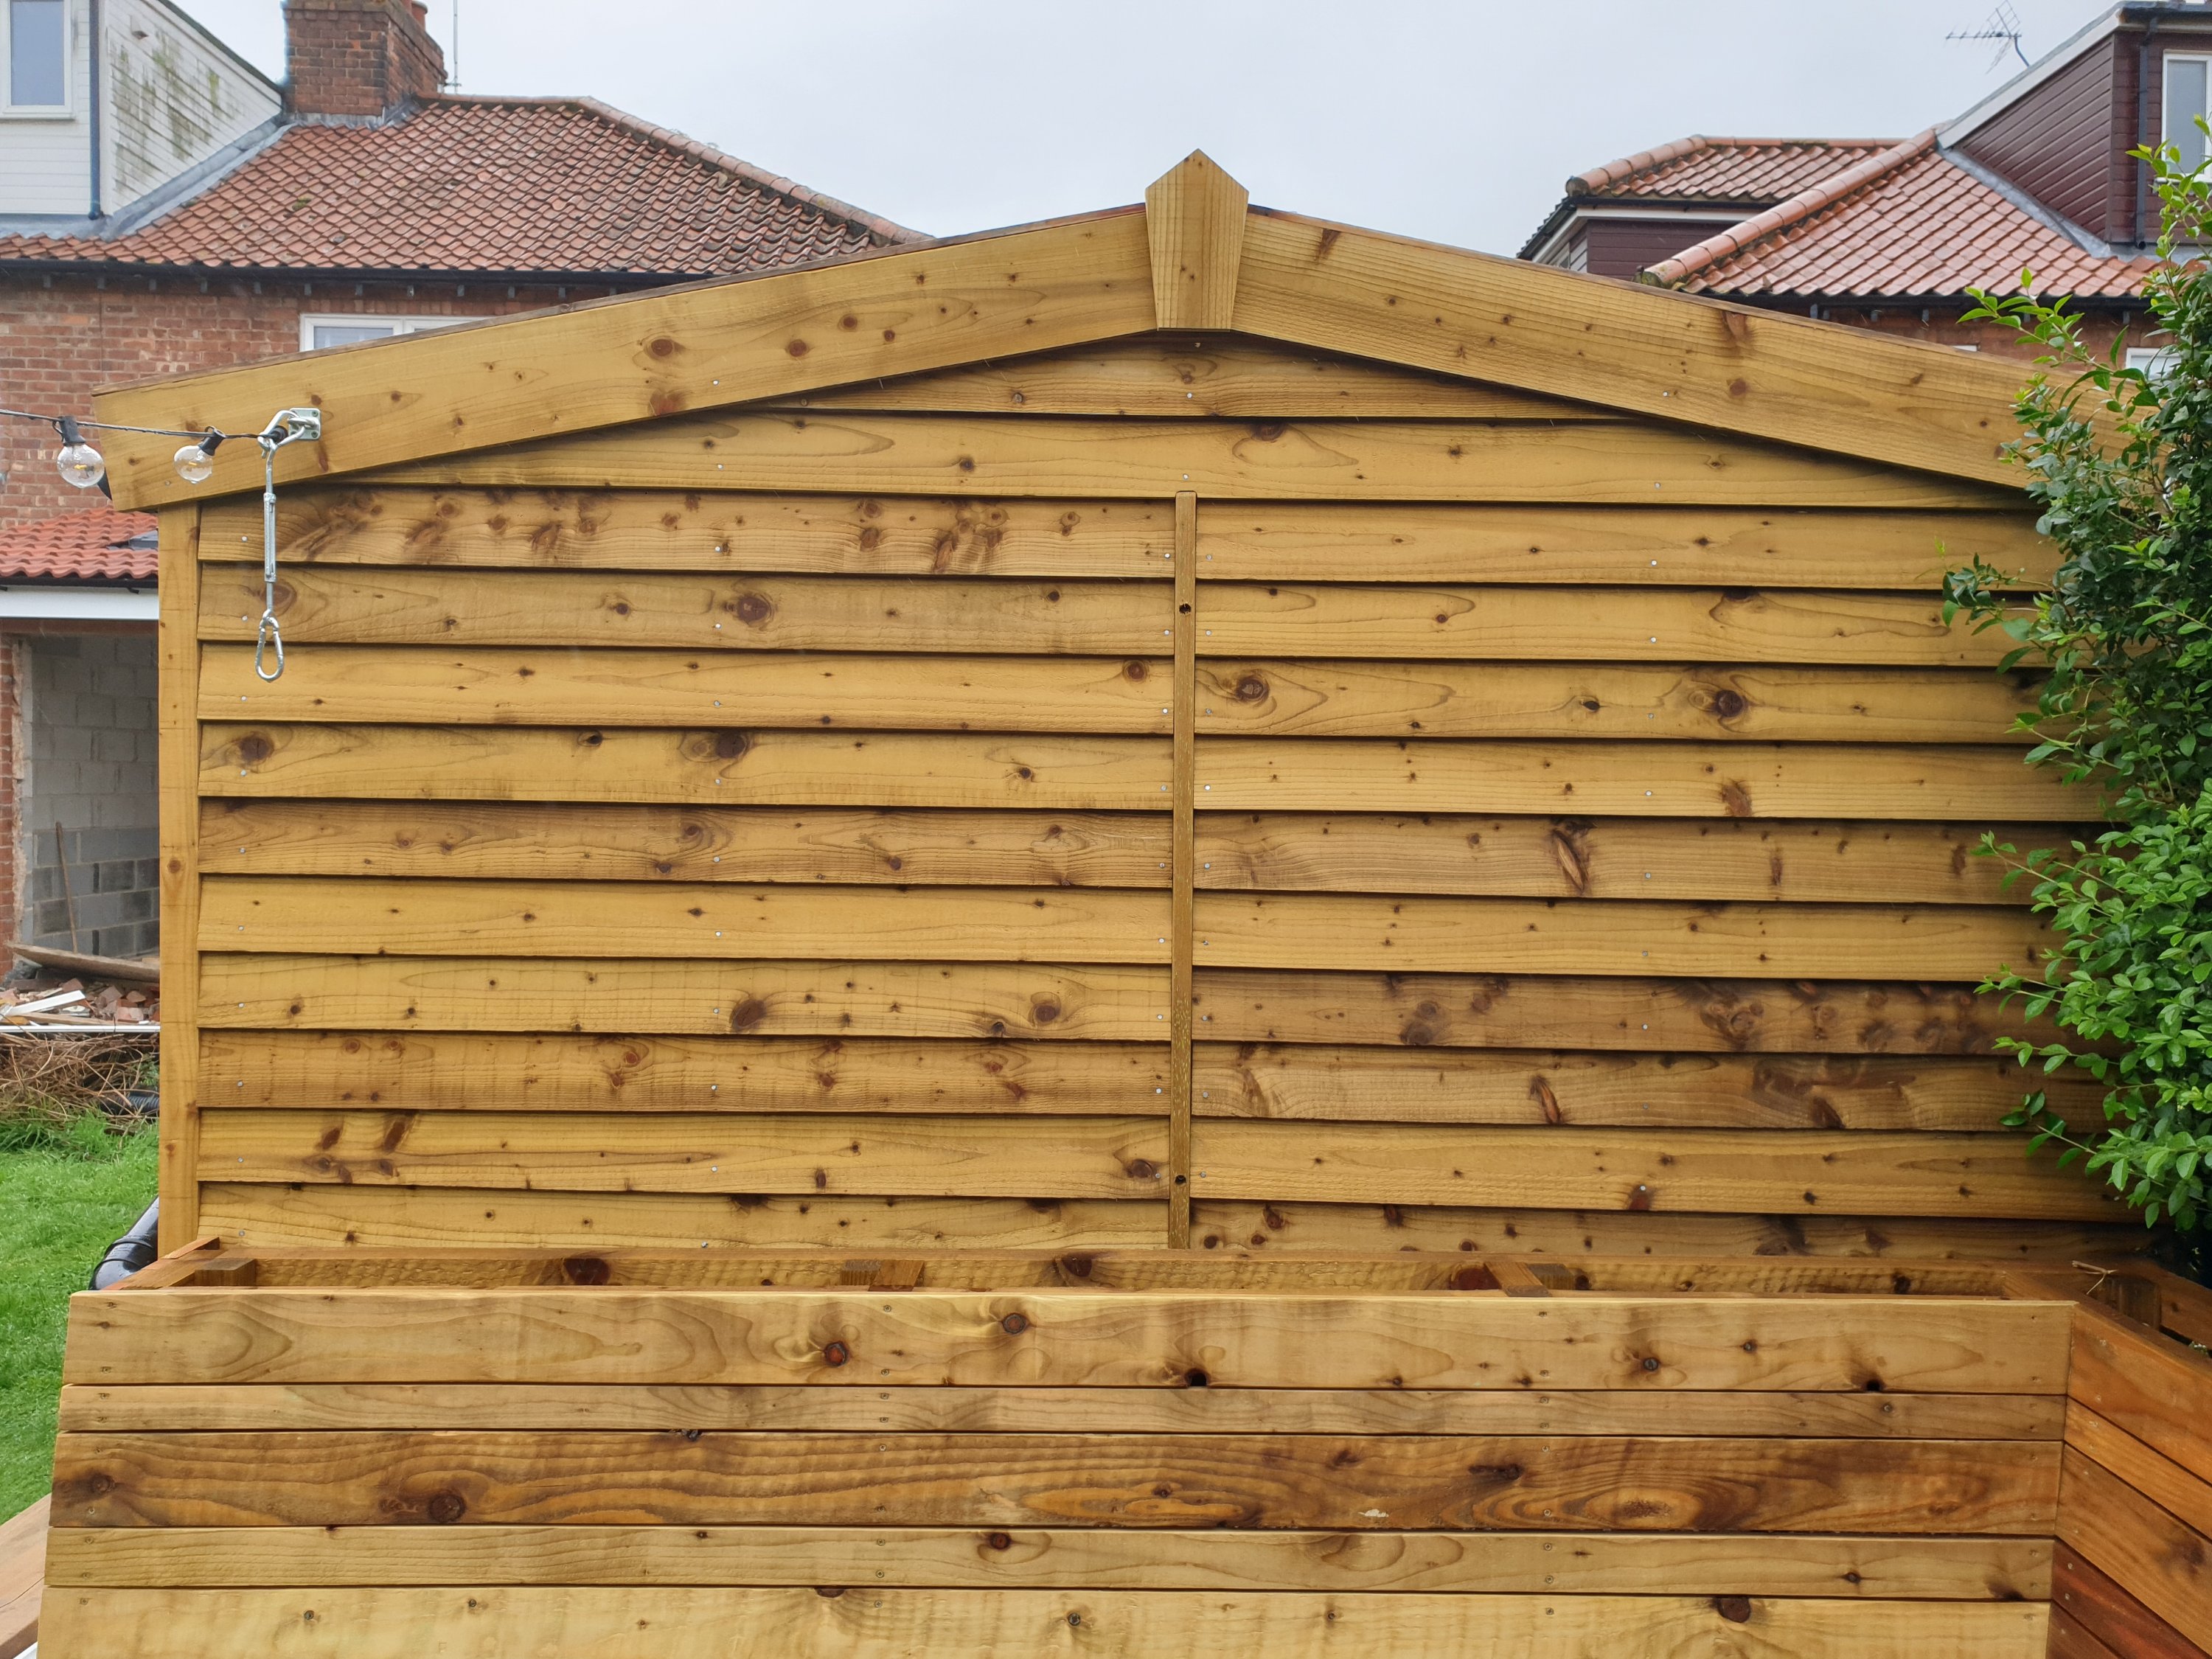
Cladding the back of the garage was pretty much the same process as the side. The main difference being the finishing trim at the top. For this, I just nailed in a couple of lengths of 150mm x 25mm pressure treated wood and covered the gap where they met in the middle with an off-cut that I sawed into a diamond sort of thing.

Cladding the front was quick because there were just two tiny sections either side of the door to clad, and I did the same thing at the top as I did with the back to make it look pretty.

There’s definitely a bit of ‘mutton dressed as lamb’ about the front of the garage as the metal door is a bit of an eyesore. We plan on painting the cladding light grey and the door dark grey one day which will hopefully make the front look better.
Trim
The cladding alone is a big improvement, but the corners of the garage and areas where two lengths of wood meet would look a mess without adding some trim. Also, the exposed cut edges of the feather edge would, in time, rot, even with the preserver treatment, so it’s important to cover them up.

At each corner of the garage, I fixed in place a length of 47mm x 47mm timber which the cut ends of the feather edge butt up against. I used adhesive and decking screws and will fill in the screw holes before painting.
I tidied up the cut ends along the side and back with lengths of 38mm x 47mm pressure treated timber that I screwed sideways into the battens.

For the bits of trim around the window I had to use my router to cut out a notch so that the window sill would sit inside. You could use a jigsaw for this but a router’s much neater.
After adding trim around the window, the orangey brown windowsill started looking pretty horrid so I grabbed a length of the same wood I used for the window trim and routed out a section that would let it sit on top of the existing window sill. A table saw would have been far easier but at the time I didn’t have one – I now could not live without one.
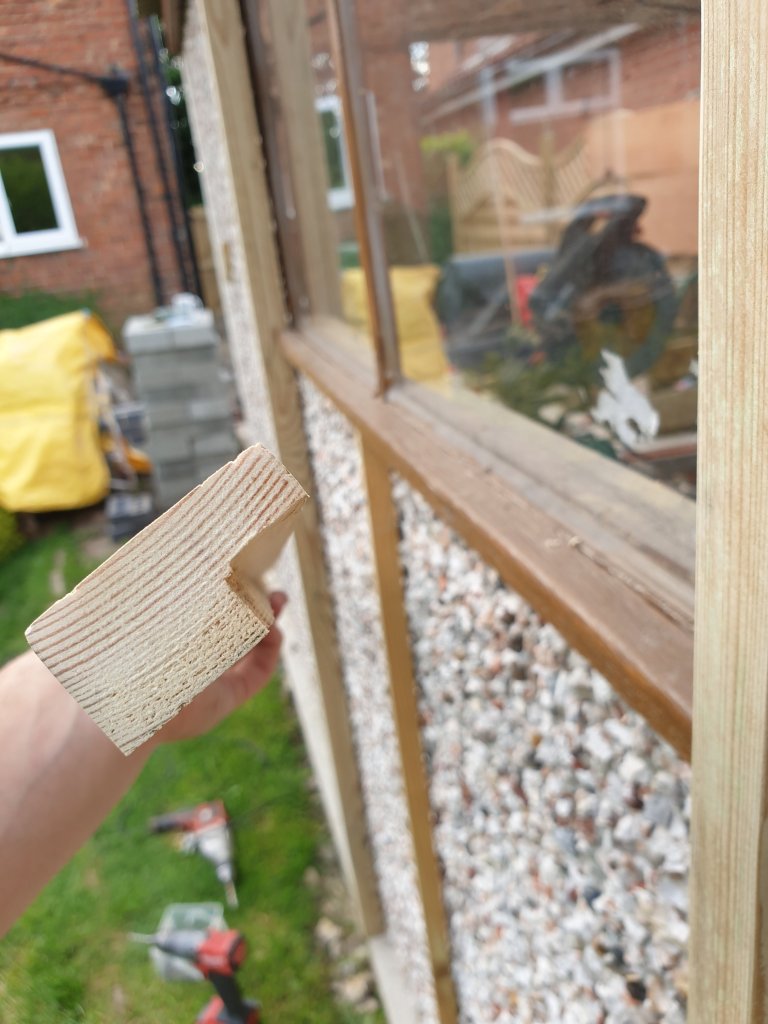
The window looked way better once it was surrounded by trim.

As with the battens, fixing the trim in place on the front of the garage was a right faff. Again, I used loads of adhesive, brackets screwed into the concrete floor and decking screws into the wood fascia until I was happy that the trim would stay in place. I fixed trim in place around the door like I had with the window.

Once I’d added the finishing trim around the door and cladding the section above it, I was done.


After a fair few nights of work, we’re really pleased with the result. At points I was doubting whether it was worth it but it cost less than £300 to turn a butt ugly pebbledash garage into a pretty handsome ‘faux shed’.

And I love the new French cleats!

If you enjoyed this post, check out some other projects like my fitted wardrobe, driveway gate or decking with integrated seats.
Equipment
- Hammer
- Combi drill & wood bits
- SDS drill & masonry bits
- Spirit level
- Metal ruler
- Router
- Socket set
- Angle grinder
- Orbital sander & 80 grit sanding discs
- Circular saw
- Clamps
Materials
- 40mm galvanised ring shank nails
- 38 x 25mm pressure treated timber (battens)
- 125mm pressure treated feather edge boards
- 47 x 47mm pressure treated rough sawn timber
- 47 x 38mm pressure treated rough sawn timber
- 150 x 22mm pressure treated rough sawn timber
- Sikaflex adhesive
- Wood preserver
- L brackets
- M6 threaded rod
- Flange nuts
- Decking screws

Leave a comment