

Within about 12 minutes of bringing Basil home (our cocker spaniel pup), it became clear that a wooden plank across the drive wasn’t going to stop him running onto the road. I spent the next couple of nights watching every DIY wood gate build on YouTube and took the best bits of each one to build ours. She still needs a lick of paint (we’re thinking dark grey) but here’s how I put it together.

Planning
I bloody love cracking out a pad to plan things like this. The gap between the side of our house and hedge after accounting for gate posts is around 2.3 metres. I decided to go for one smaller gate for everyday use (90cm) and another larger one in case we needed to get anything chunky through (1.4metres). As for the height, we wanted a bit of privacy without it looking like a prison so 1.75 metres seemed sensible as it would only allow tall men to see over.
After deciding on gate dimensions I worked out what post sizes I’d need, the framework design, what cladding to finish the gate in and the hardware (including hinges) that would suit the gate best. So there was actually a fair amount of planning involved given the gate itself was a relatively quick build.
Gate posts
Good old Google told me that I would need a 75mm x 75mm post for the smaller gate and that 125mm x 125mm would be a safe bet for the big boy. The smaller one would be fixed to the house so I just went for a 1.8metre post but the hedge side would need to be concreted into the ground. I bought a 2.4metre long post so that around 60cm could be concreted into the ground to make sure it was sturdy.
Before securing the posts I had to make sure that they would be positioned so the gate would be perpendicular to the wall. I went old school to work this out and used the 3, 4, 5 method. I cut 3 lengths of scrap wood to 1.5m, 2m and 2.5m (the 3, 4 and 5) and then laid the 1.5m length against the house. The point at which the other two lengths meet gives a perfectly perpendicular line to the wall. Good old GCSE maths.

To secure the wee post to the house I leveled it up and fixed it in place using four 12cm frame fixings. Turns out that our exterior wall is miles off straight up (mildly concerning) so I had to pack out the bottom. At some point I’ll get round to hiding the gap.


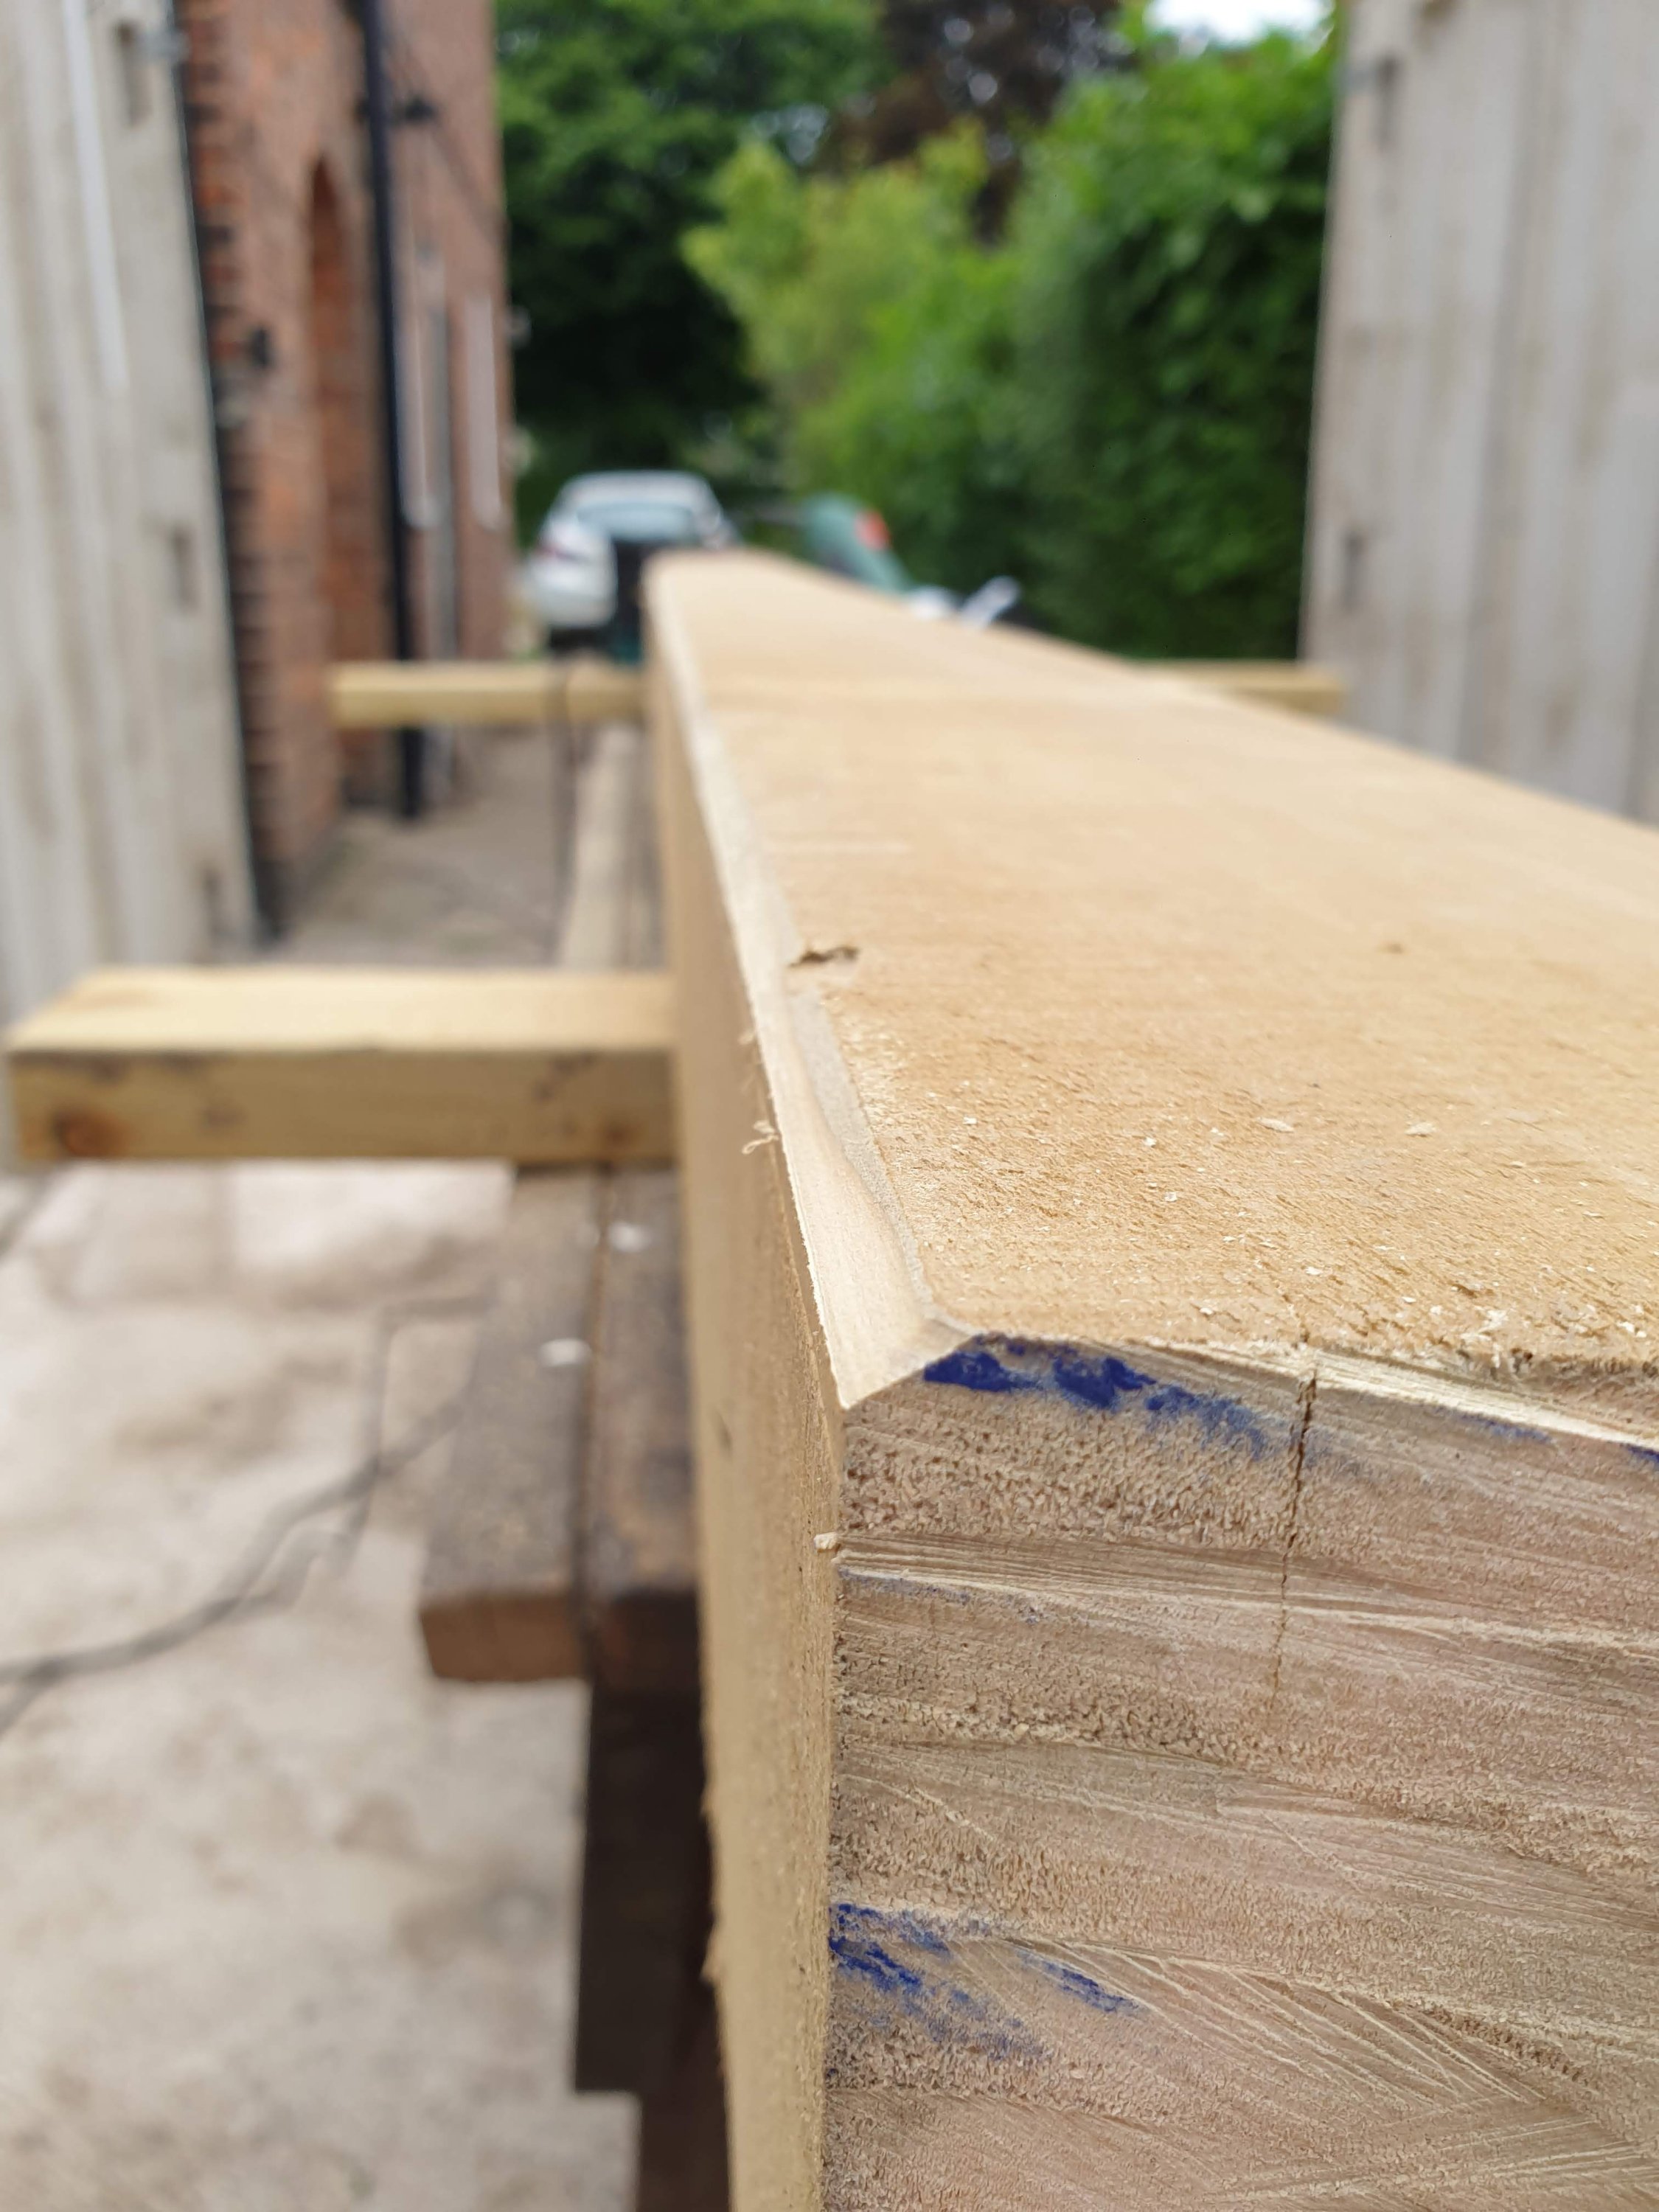
The larger post was in a bit of a state so I gave it a good sand and used a chamfer bit on my router to give it a clean edge.
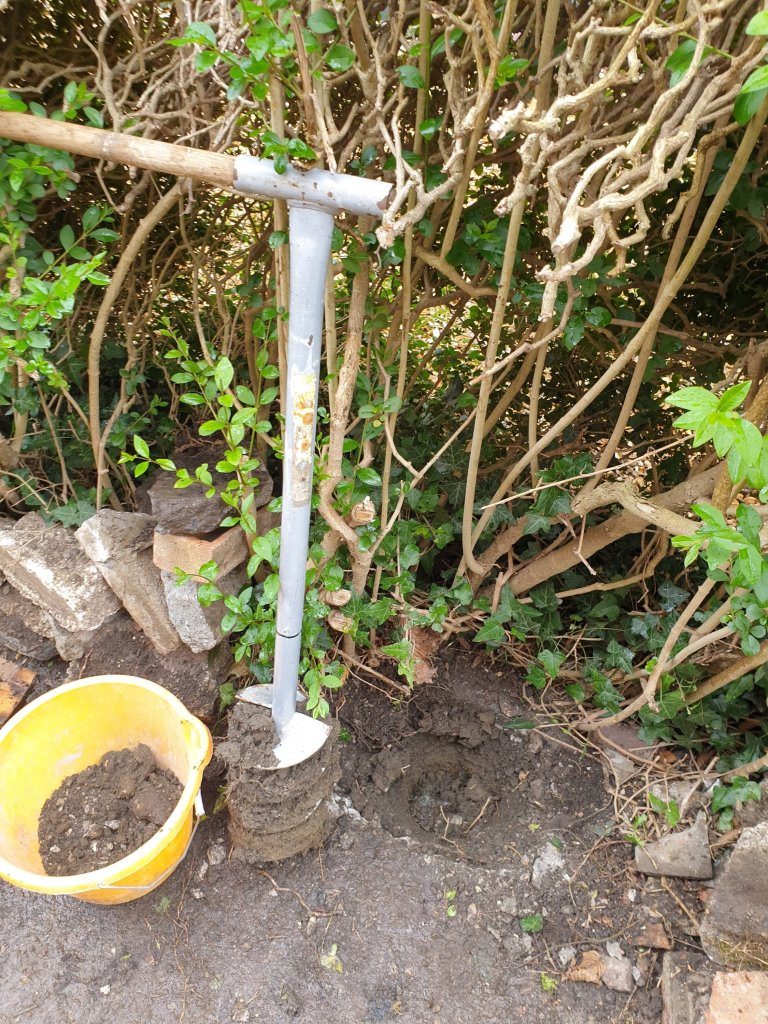
Digging for the big post would have taken hours if it wasn’t for the post auger I borrowed from my Dad. It looks far too silly to be any good but actually it tore up the ground with ease.
Once the hole was ready I plonked in the gate post which I’d soaked the bottom of in creocote to make it last longer. I sat the post on a layer of gravel to aid drainage.

Two or three bags of postmix would have done the job but I had leftover ballast and cement from the garage concrete pad build. So out came my trusty £100 cement mixer and after a couple of mixes the concrete was in.
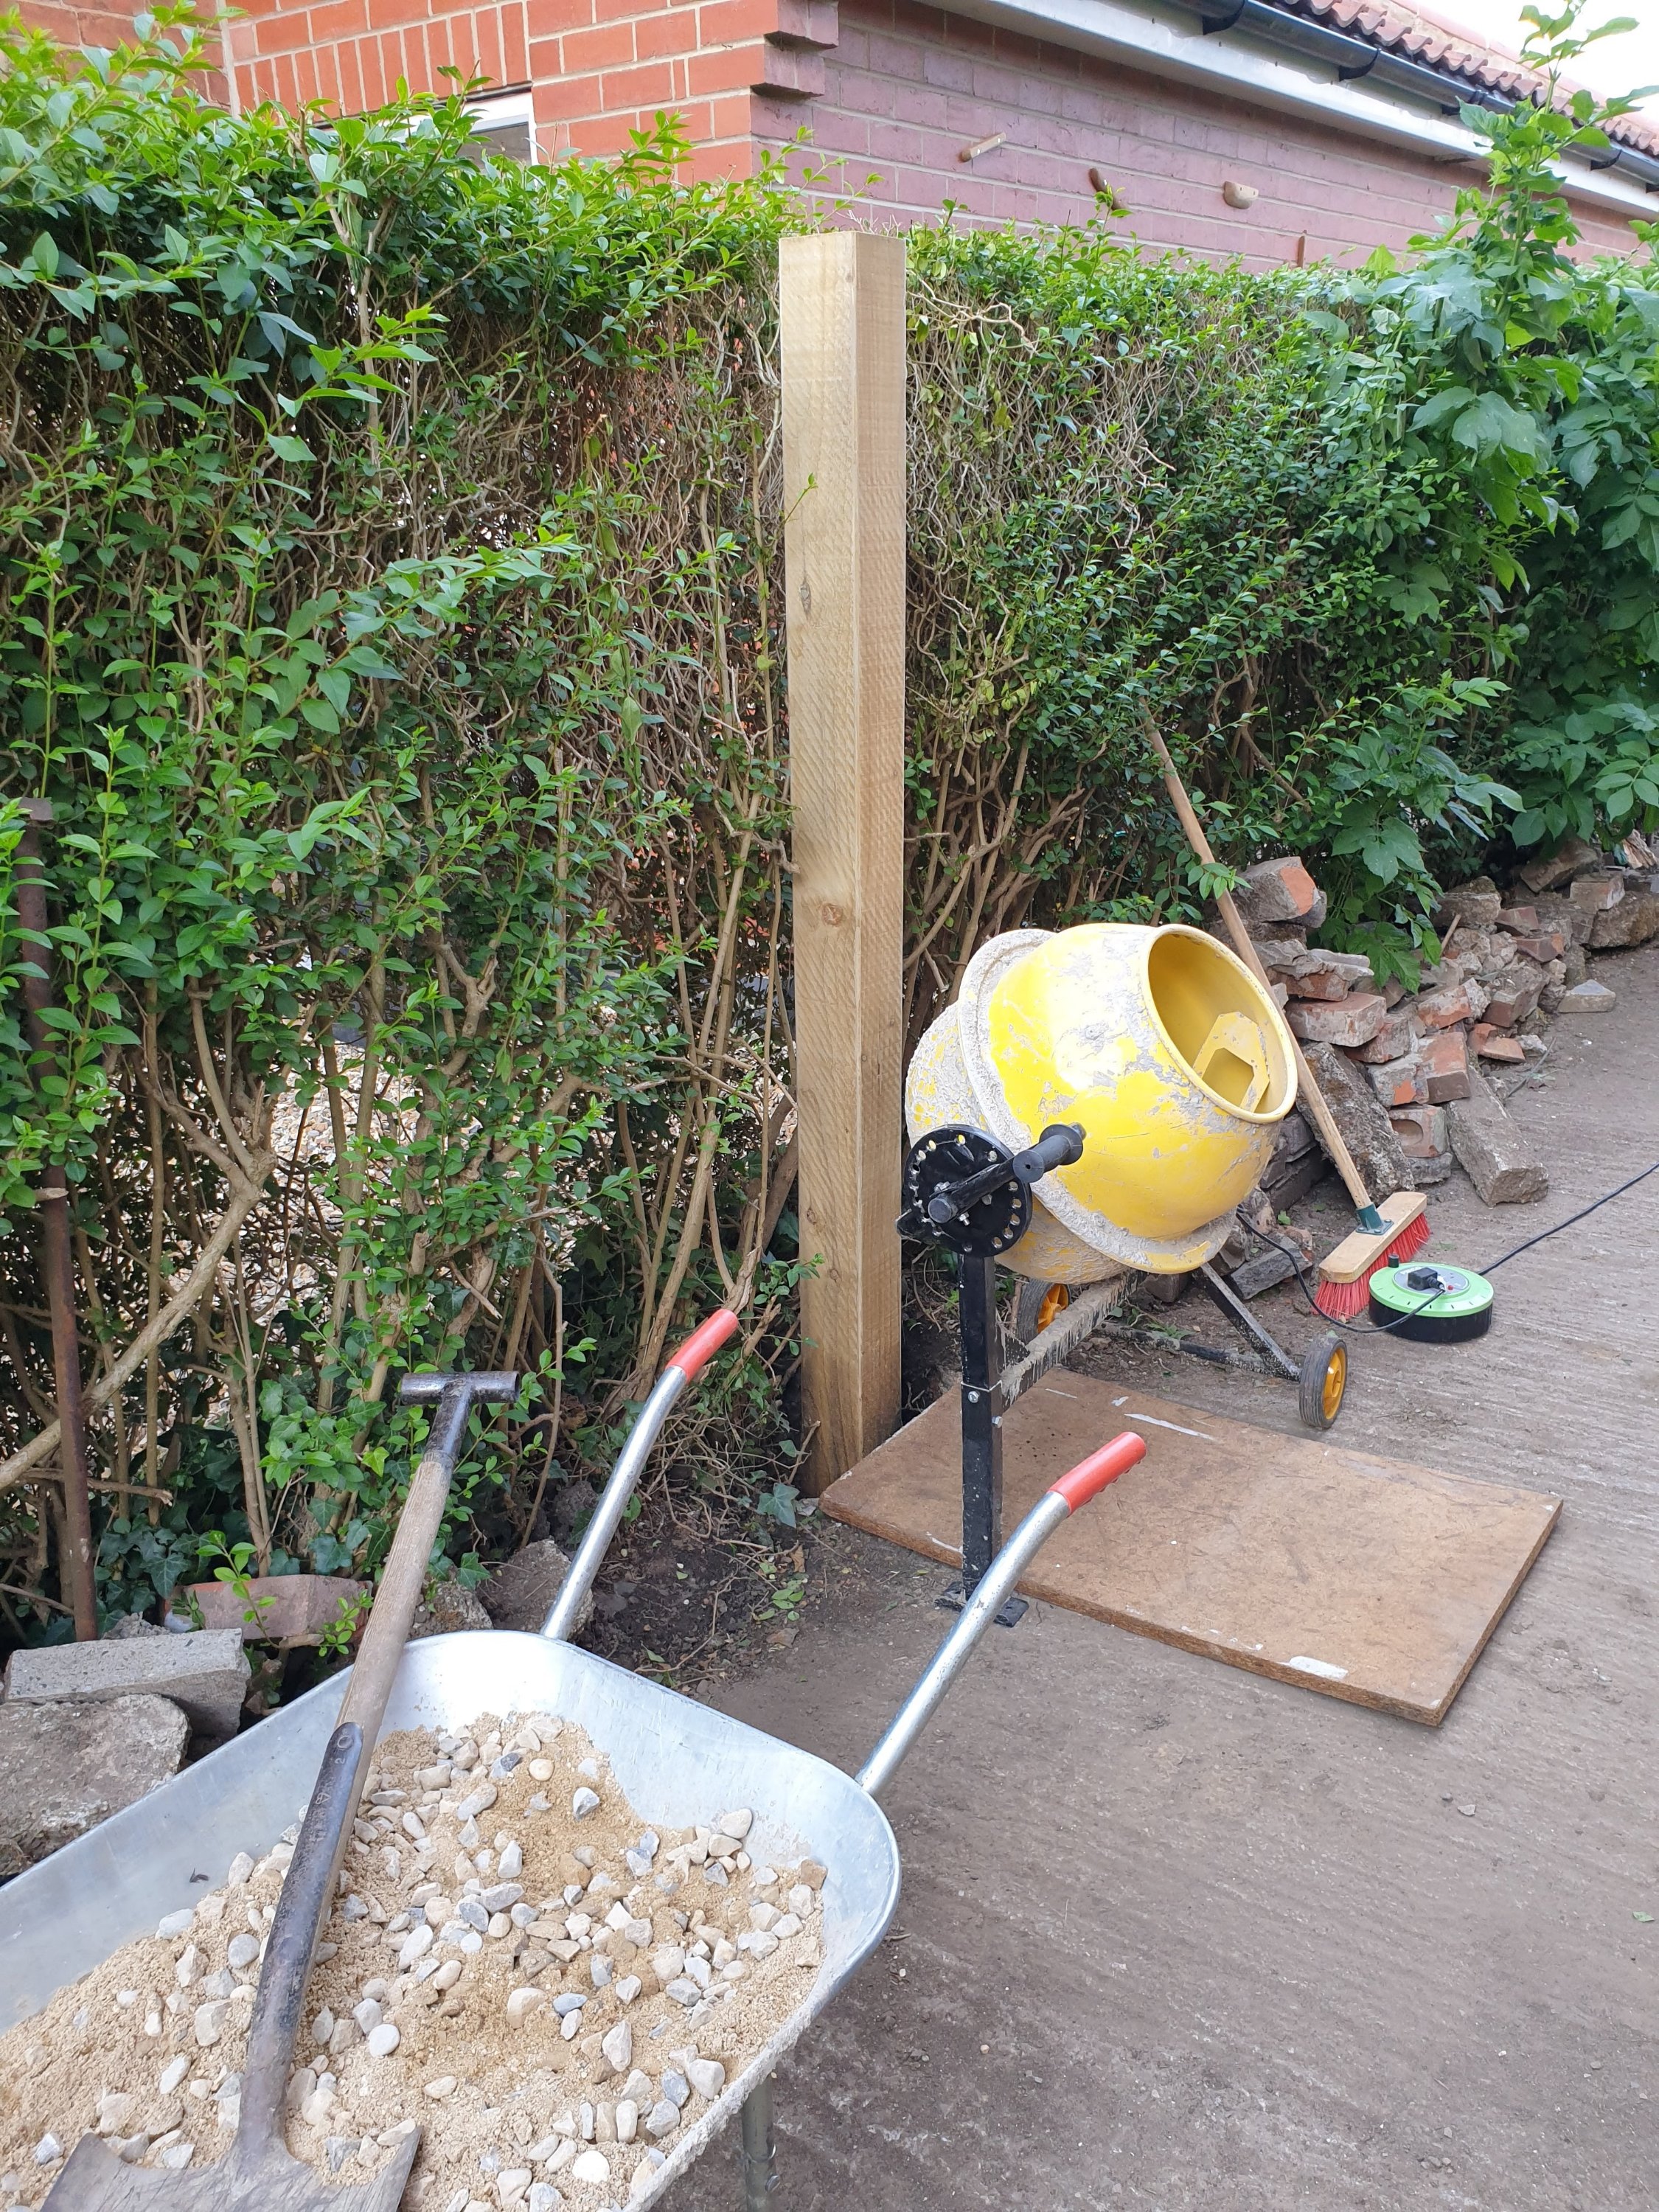
Whilst the concrete was still wet I attached a couple of stakes and levelled the post up.

I tapered off the concrete at the top to make sure water runs away from the post.

The posts were level across the top and so it was onto making the actual gate.

Framework
I went for a belt and braces approach to the framework to reduce the chance of sagging. It’s made from 45mm x 95mm pressure treated wood and is glued & screwed using a half lap technique so it’s ultra strong and as square as possible.

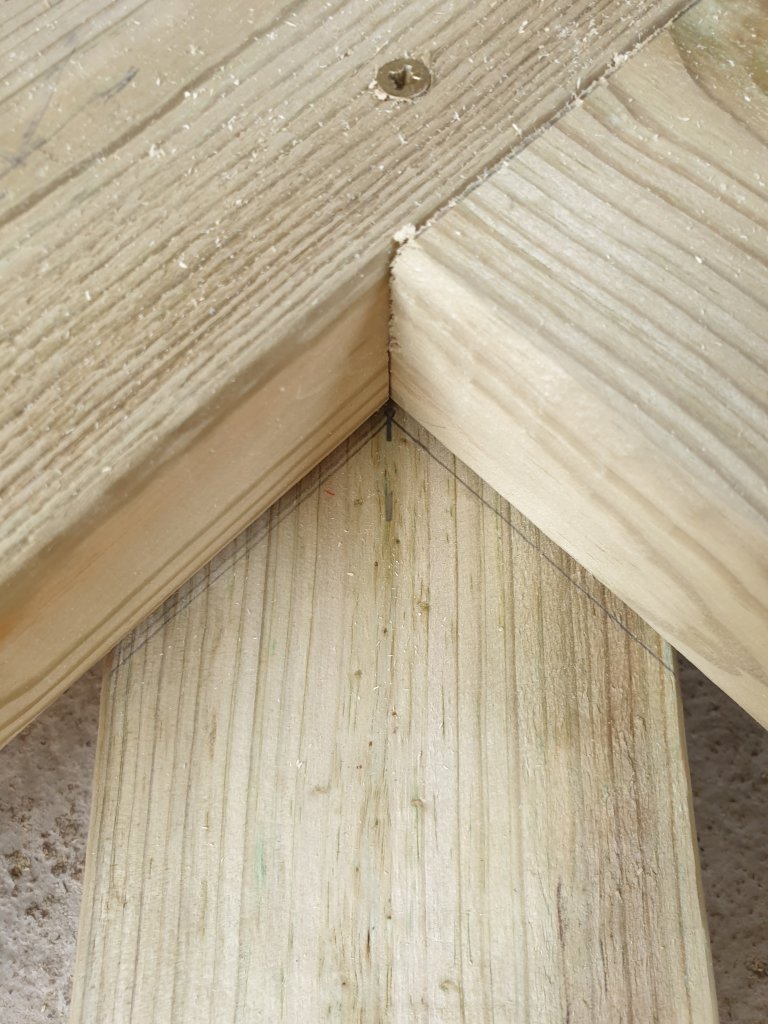
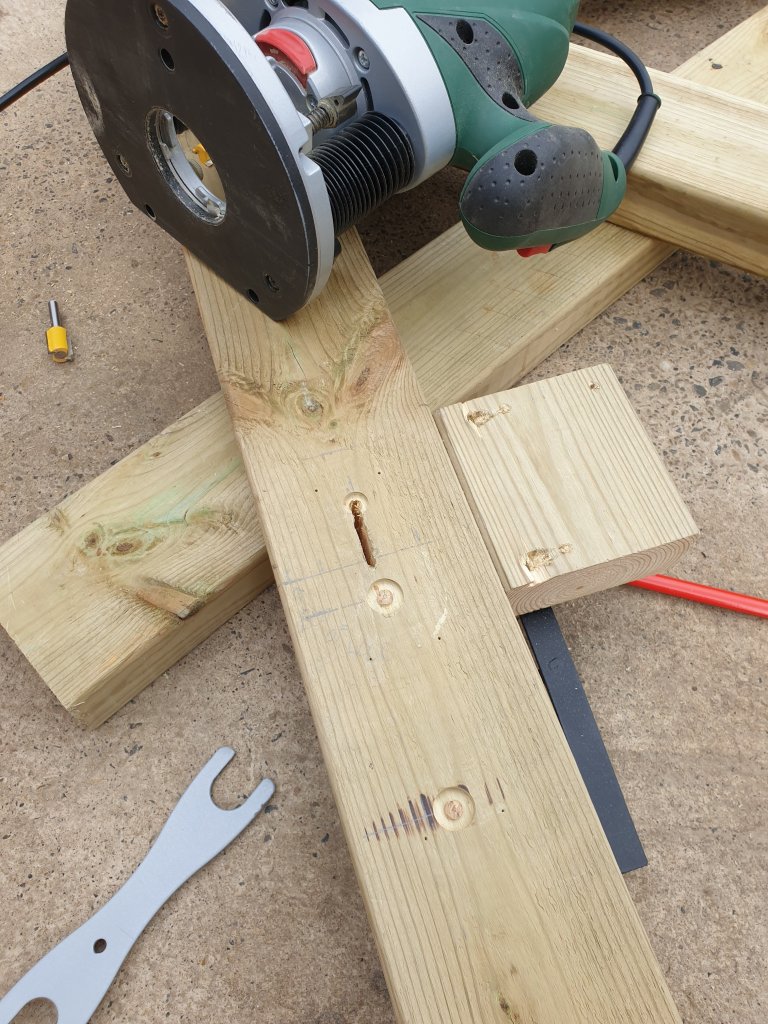
To create the half lap joints, I used a mitre saw set to cut to the depth of exactly 22.5mm so that when two half laps are combined, they sit flush with the rest of the frame. First, I made several ‘kerf’ cuts spaced 5-10mm apart.
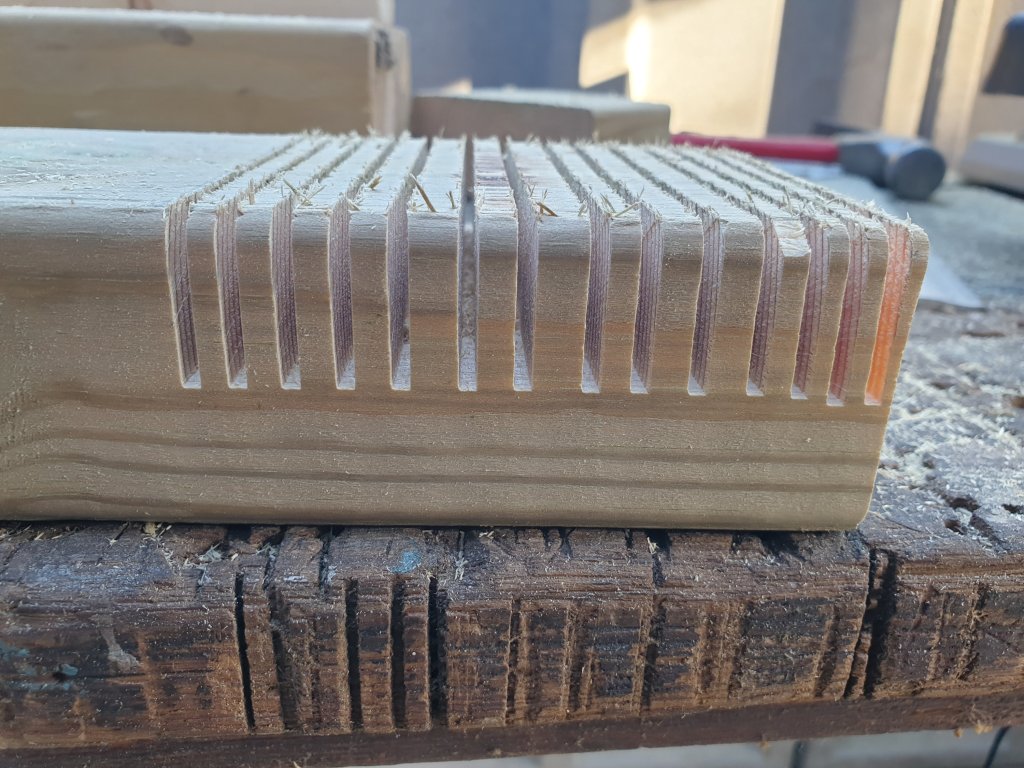
Then I hammered out the remaining wood which left a rough finish.

The final step was to run the wood through the mitre saw again to give a smooth finish.

To allow the mitre saw to cut these half laps to a consistent depth, a piece of sacrificial wood needs to be used as per the below image.

After really carefully measuring, marking and cutting all the half lap joints, the framework slotted together perfectly which was a joyous moment.
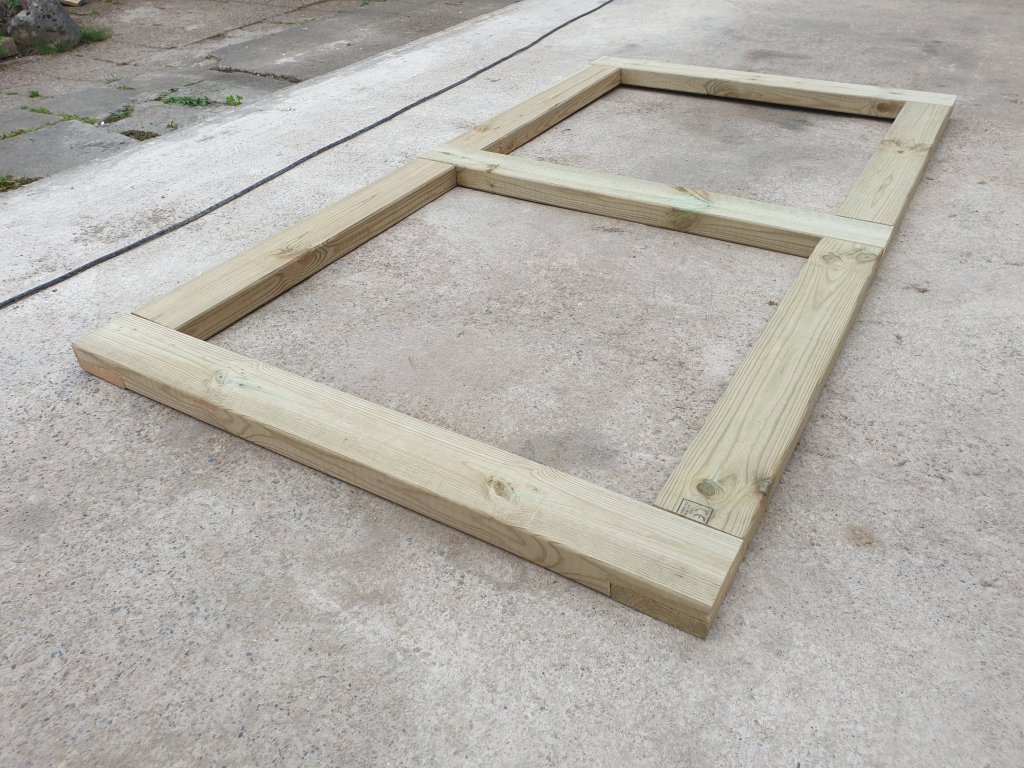
If you’ve measured up properly then the added benefit of half lap joints is that the frame should be perfectly square. The last thing you want is a gate frame that’s not square so this needs to be checked and adjusted if required.

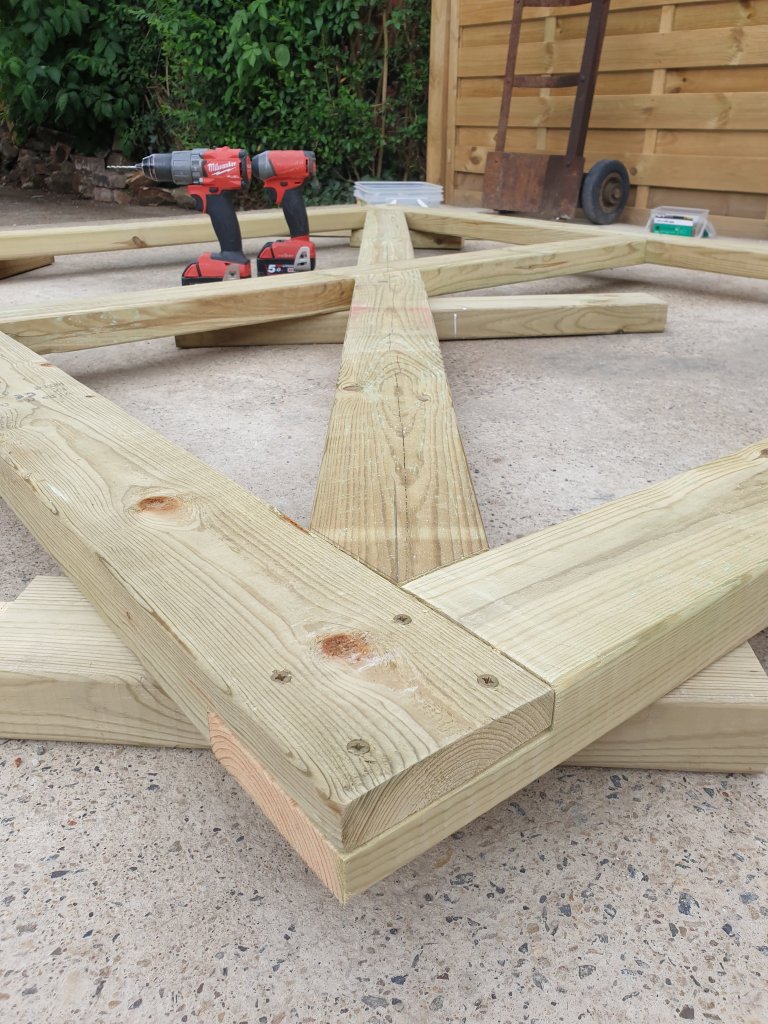
After checking for square, I glued and screwed the frame together through the half lap joints. As the front of the gate will be hidden with cladding, I screwed through the front.

After glueing & screwing the outer frame and middle support I moved onto the diagonal braces. Rather than fannying around with measuring these, I placed a length of timber below the frame and marked on where to cut.
Then it was simply a case of cutting, tapping the diagonals into place, lining them up and screwing in place. Ideally I’d have used pocket holes but I ain’t got a pocket hole jig (yet) so just screwed in from an angle.
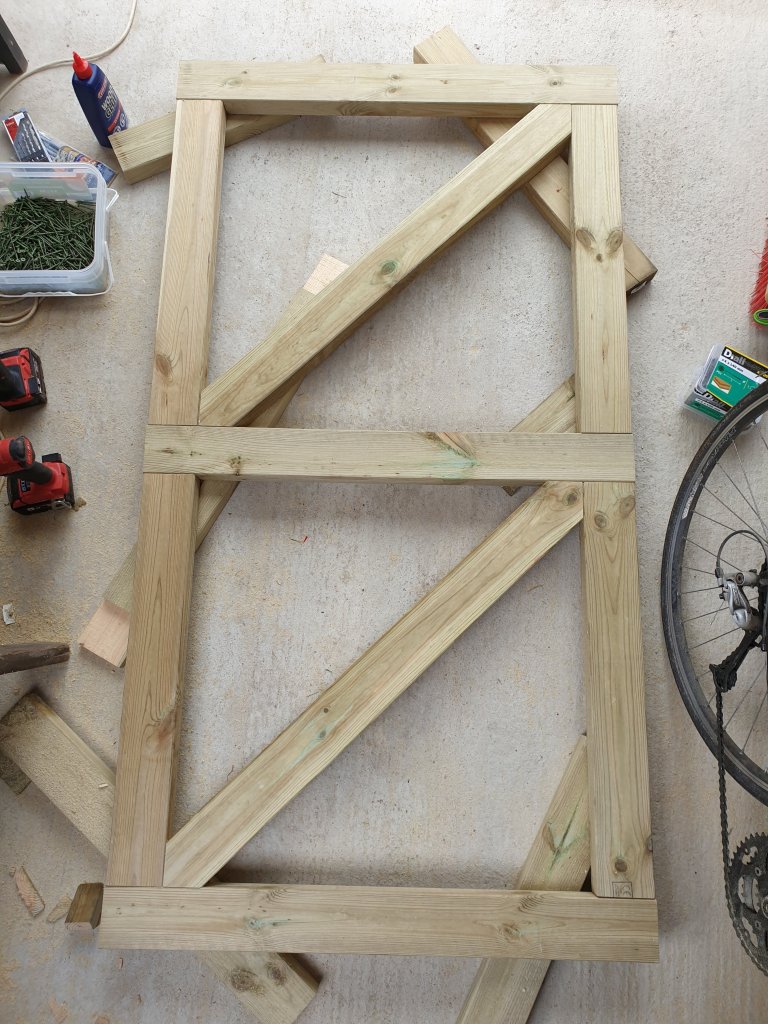
After doing this process for both gates, I propped up both gate frames in place to check that I’d allowed enough space for them (ideally 1cm to either side and the middle) and all good. Framework done, onto cladding.
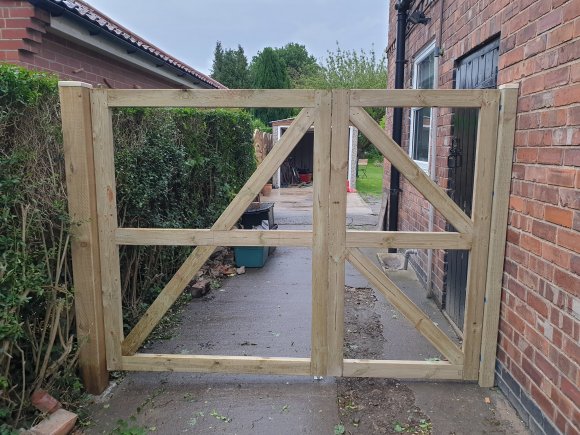
Cladding
I should point out that I got a little excited after making the framework and went straight ahead with adding the hinges and other hardware before cladding. This worked out fine but if I did it again I would have clad the gate first, mainly because the added weight of the feather edge can make the gates hang differently. I’ve written the below based on the better method of cladding the gate before adding hardware, but some images will show hardware without cladding.
There are few cladding options including tongue & groove which is very popular. I went for feather edge as I love the look and it’s cheap compared to other cladding options. Plus I’ve clad our garage in feather edge and plan to make a bin store out of leftover feather edge.
I used 125mm wide boards and overlapped them by 25mm so each board covered 100mm. I cut the feather edge lengths to size and did a dry lay on the frame. This is a really important step as otherwise you may end up accidentally getting a repeated pattern of knots on the gate which would look naff.

The drawback of feather edge is that it’s typically made from fairly crap quality timber. Nothing that a quick sand won’t sort, though.
Before fixing the cladding in place, it’s worth doing 2 things to make alignment of the feather edge as accurate and consistent as possible. The first is to screw a piece of scrap wood against the top of the gate to butt the feather edge up to. This ensures perfect vertical alignment.

To get the horizontal alignment spot on you’ll need a spacer so that the overlap is consistently 25mm. I made a spacer by putting 3 screws into a scrap piece of the 95mm x 45mm framework. The screws protruded by 5mm, giving the 100mm that each board would be on show for. The beauty of making a spacer with screws like this is that when I got about 2/3 of the way to end of the gate cladding, I could measure the remaining space and adjust the screws slightly to make sure the feather edge boards ended exactly where I wanted them to.

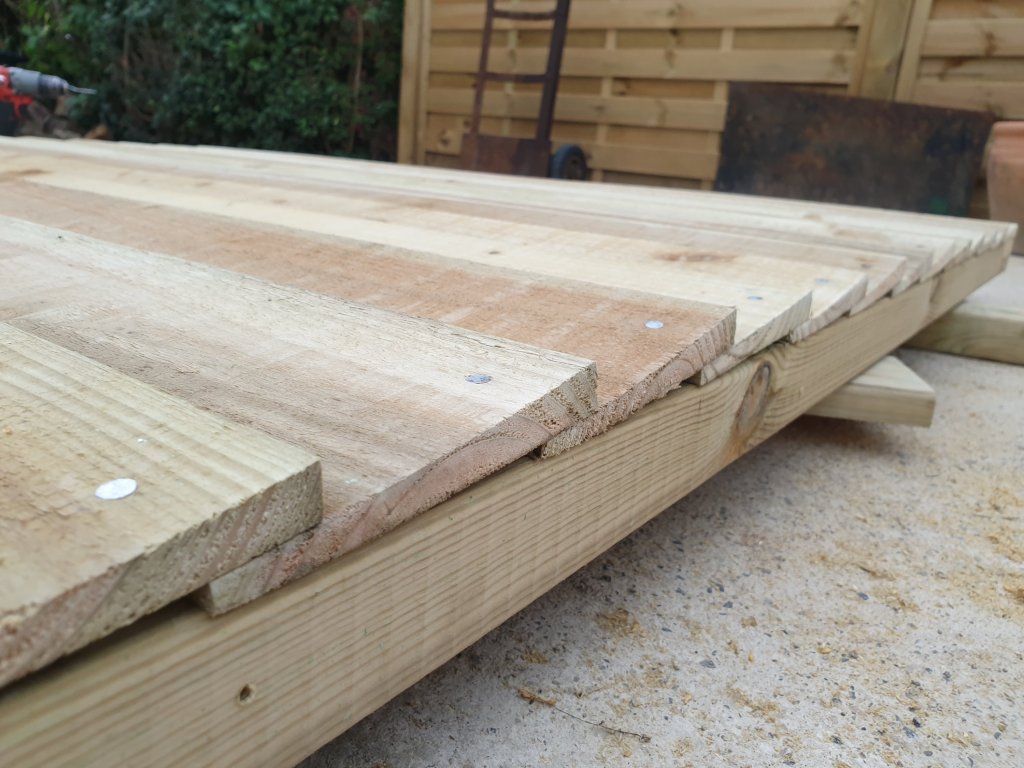
Onto fixing the boards in place. I opted for 40mm galvanised ring shank nails as screws just don’t look right in feather board. It’s really important to give the nails a tap with a hammer to blunt the end before hammering on you’ll probably split the feather edge boards.
The position of the nails is key as you want them to only go through one board and effectively clamp down the previous board. Some people suggest that each nail should go through 2 boards but most advice online suggests that this can split the wood when it contracts/expands with the weather. I positioned the nails 30mm in from the thick edge, allowing a 5mm space between the thin edge of the board below. These photos makes what I’m on about much more clear.

Before cladding to the end of the large gate I fixed in place a length of wood for the small gate to close against and to hide the gap between the middle of the gates. I gave it a quick chamfer with my router to make it look pretty.
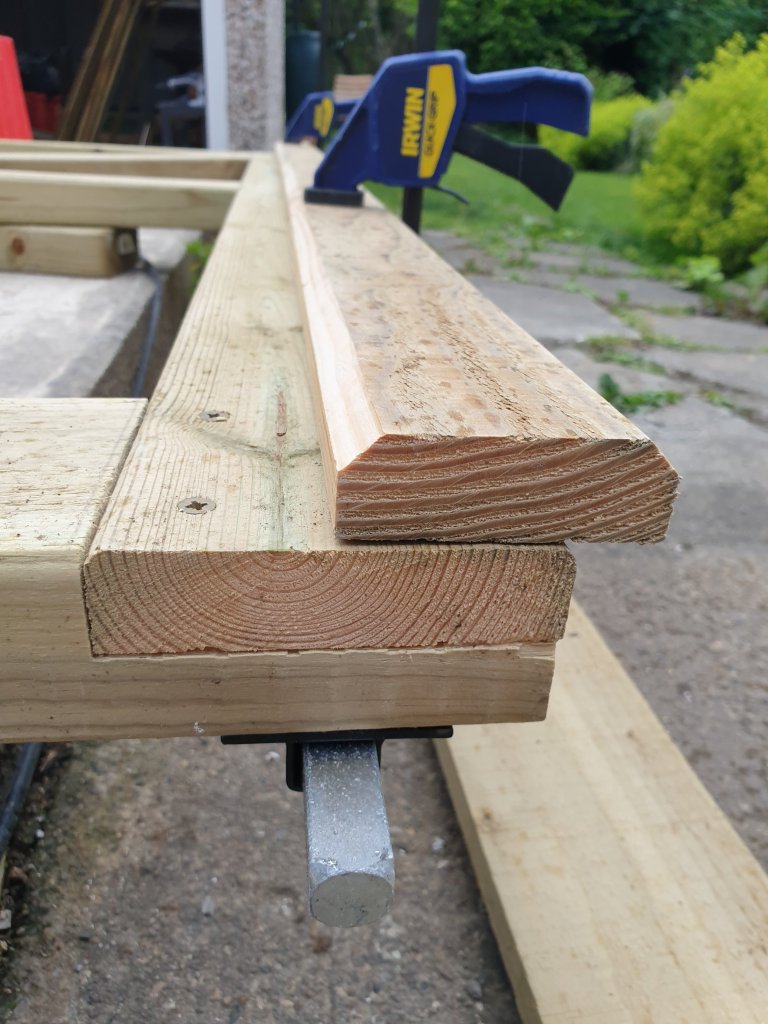
I then added the final boards and voila, cladding done.


Hardware
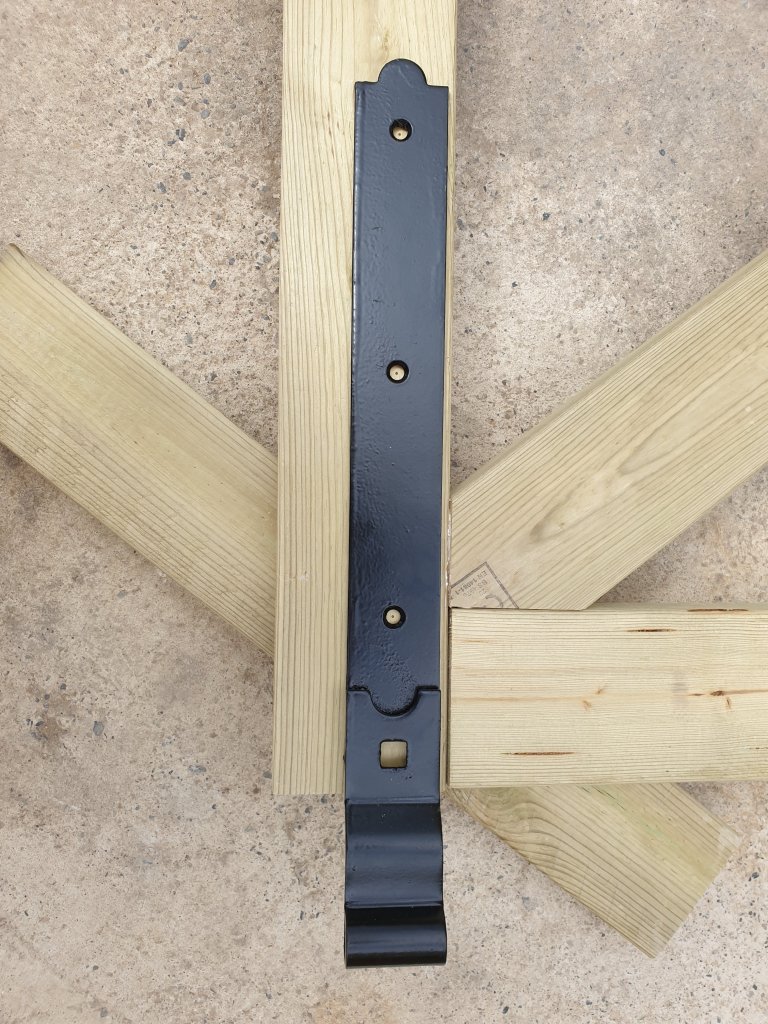
There are a fair few options when it comes to hardware but the hinges are what you really need to get right. Nobody likes a saggy gate. I opted for hook and pin hinges that span about 1/3 of the gate. Fixing the hook part in place was just a case of marking out the position on the top and bottom parts of the frame and screwing them.
The next step is to get your gates positioned between the posts so you can align and fix your pins to the gate posts. You’ll definitely need a helper for this step as getting the gates level is takes a lot of adjustment. Something that made this adjusting way easier was to use wedges to support the gate. The height that the gate is lifted off the ground can easily be adjusted by moving the wedges closer together or further apart until the alignment and levels is spot on.

With the gates propped in place, I fixes the pin part of the hinges onto the gate posts and hung the gates. This was an exciting moment. The last step was to fix in place the coach bolts that go all the way through the gates frame and cladding. I used a spade bit to create this opening and was careful to drill through both sides to prevent causing a mess.


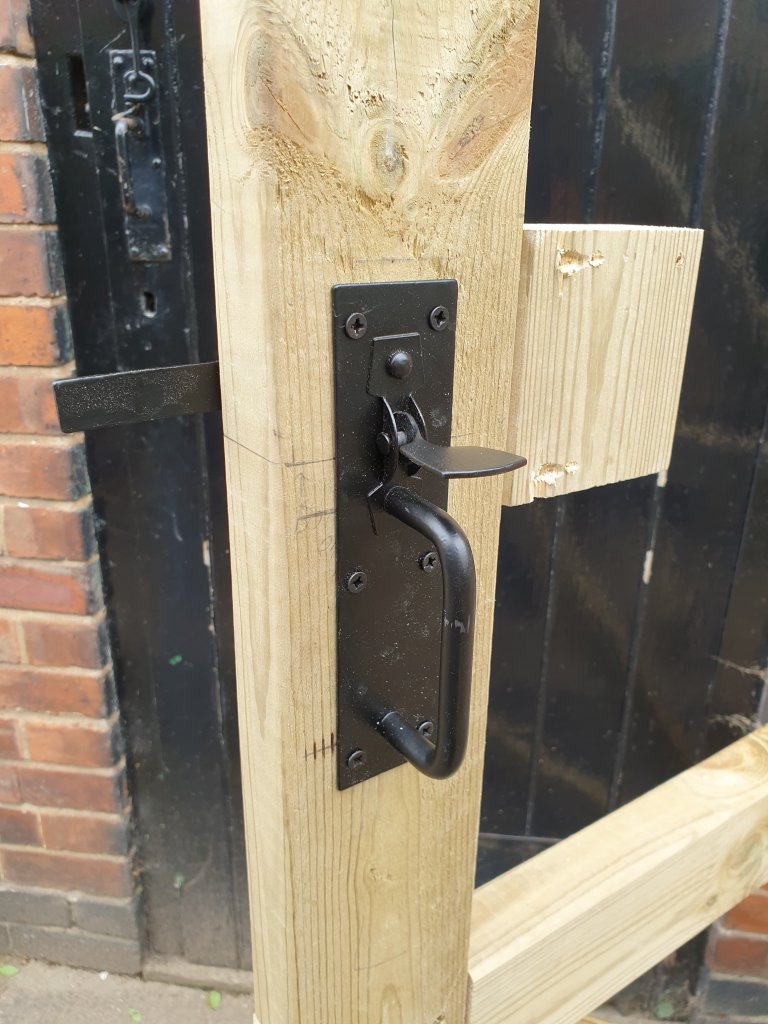
With the hinges on, I decided to fit the opening/closing mechanism next. I went for a Suffolk thumb latch cos I think they look great and are easier to use than the ring latches that are on most gates. First, I fixed a block in place to mount the inside element of the latch.
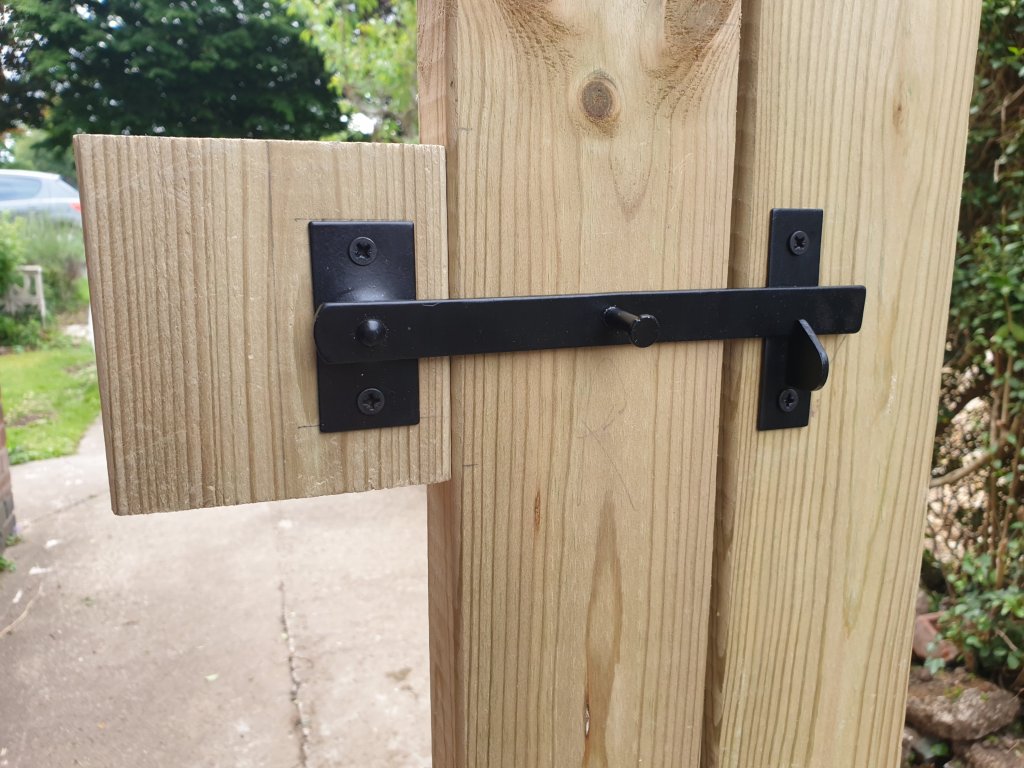
Then I stitch drilled an opening for the lever that lifts the bar over the catch (struggling for correct terminology here) and did a little routing to make sure the thumb side of the latch could mount flush to the frame.
Finally, I screwed the thumb latch in place. When it came to cladding this section I used a jigsaw to cut out around the thumb latch and routed the cut edge with a chamfered bit.

The final bits of hardware I added were a monkey tail bolt to anchor the larger gate to the ground and a Brenton bolt so that we can padlock the gates shut. These were simply screwed onto the gate with the opening for the monkey tail bolt fixed into the concrete ground.

Finishing touches
To prevent rain from getting into the cut ends of the feather edge and rotting the wood, I fixed a top cap in place.

The final touch was to screw in some post caps to, again, protect the end grain. I cut these using my mitre saw and finished off the edges with my trusty chamfered router bit.

We’re really chuffed with how the gate turned out. Main thing is that Basilly lad can’t now (easily) escape! Altogether it cost £220 which is a hell of a lot cheaper than getting it made and fitted, and a lot more rewarding. If you fancy giving something similar a go I’ve put the equipment and materials at the bottom of the post.

If you fancy checking out some of the other DIY we’ve got up to, here’s how we built my workshop, how we made our scaffold board dining table, and how we laid our porcelain patio.
Equipment
- Mitre saw
- Router
- Spirit level
- Post auger
- Cement mixer
- Tape measure
- Combination square
- Hammer
- Combi drill
- Impact driver
- Adjustable wrench
- Pencil
- Clamps
- Power sander
Materials
- Gate posts
- Scrap wood for stakes
- Frame fixings
- Galvanised ring shank nails
- Decking screws
- Feather edge cladding
- 95mm x 45mm C16 timber for framework
- 2 sets of hook and pin hinges
- Suffolk thumb latch
- Brenton gate bolt
- Ballast
- Cement
- Gravel
- Exterior wood glue

Leave a reply to C T Cancel reply